 You are not logged in to Prodigits. Please register or login.
 You are not logged in to Prodigits. Please register or login.
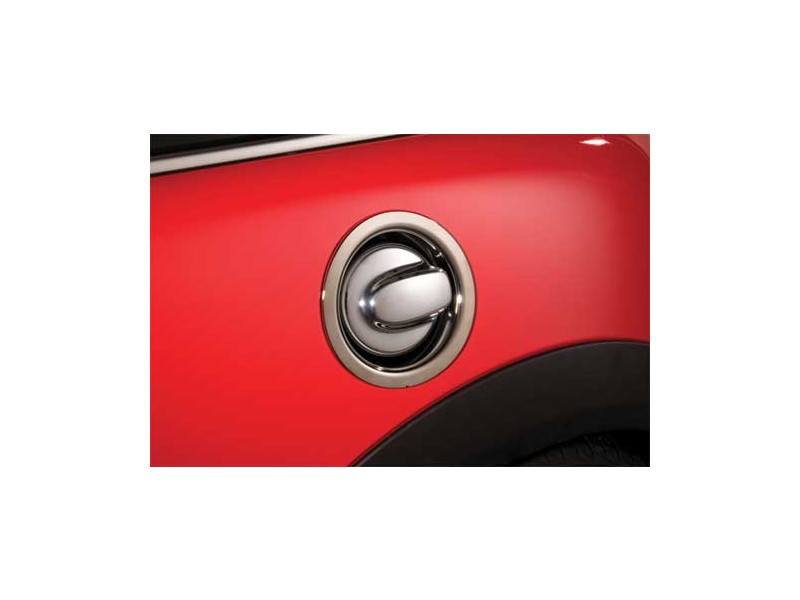
Subject: BMW Mini racing fuel cap conversion
Replies: 4 Views: 116
mikeymk 23.02.24 - 03:51pm
There's a lot to it, but if you have a modern(ish) mini with flush fuel door, and you want the racing style filler, it's not a 5-min swap.
Here's the full instructions on how to do the conversion...
Fitting Instructions
1. Jack up and remove wheel.
2. Chock under the hub and ease the car down onto it so the weight is off the car jack.
3. Remove the black plastic screws and their surrounds from the cover behind the wheel.
4. Remove 2 plastic nuts from the cover behind wheel.
5. Remove 1 self tapping Torx screw from the bottom of the wheel arch at the front of the rear wheel.
6. Remove steel nut holding filler to bodywork underneath wheel arch.
7. Remove steel nut holding filler tube to bodywork underneath wheel arch.
8. Lift the filler tube over the stud that held it to the bodywork.
9. Open the filler cap, remove black cap, push the filler inwards into the wheel arch, you may have to wiggle the filler at the same time.
10. Remove the filler locking mechanism.I used the torx screwdriver to rotate the black plastic grommet anti clockwise 1/4 turn, then pull itfrom the rubber gaiter underneath. It may be best to lock the car so that the filler lock plunger moves further in. I didn't do this and ended up losing it inside the bodywork for some time!
11. With your left hand put your fingers into the noe empty filler hole, find away underneath the rubber that seals it between the filler pipe on the right hand side and give it a tug outwards and to the front of the car at the same time, hopefully it will pull off one of the little clips that holds it to the bodywork.
12. Remove the old filler cap
13. Put the new filler in position, before clipping it fully, make sure it fits over the locking plunger, then place the plastic grommet and rubber gaiter over theplunger and clip into place, the push onto bodywork.
14. This is the hard bit...push the filler pipe back onto the stud on the side of the bodywork, after I did this the filler spout fell into place i * +
mikeymk 23.02.24 - 03:52pm
 * +
* +
mikeymk 23.02.24 - 03:57pm
The rest of it, as i could only post half in the intro...
14. This is the hard bit...push the filler pipe back onto the stud on the side of the bodywork, after I did this the filler spout fell into place in the the rubber seal on the filler cap. Believe me you will not regret chocking the car at this point !!!
15. Once the filler is in place, remve the rubber lanyard from the old black filler cap where it slots into the old filler, and replace on the new filler cap.
16. Fit new plastic trim into bodywork. ( You will have to have this painted to match your car) It just clips in. Be careful when you remove the old one as you may scratch the paintwork..
17. Refit the 2 steel nuts underneath the wheel arch, then re-attach the wheel arch cover, the 4 black plastic screws just push in this time, the 2 plastic nuts and 1 self tapping torx screw. * +
mikeymk 23.02.24 - 04:02pm
18. Enjoy the extra 150 bhp of pure awesomeness this brings. Wonder what other mundane features the first owner was happy to accept, and pity them for the uncharismatic life path they must be forming. * +
crail 25.02.24 - 07:06am
Man, that fuel cap looks fast *
+ refresh
+ my page
+ functions
3 search
4 submit a reply
+ bookmark
8 Cars&Motor Sports Forum
9 Forum Index
